Thursday, July 22, 2010

must try...vanilla syrup

photo by jocelyn larsen

take your right hand and cover up both the seltzer water and the glass-with-ice in this picture.  got it?  yes?  okay, we're just making the secret weapon of stuff sitting on the left of the picture.  why, pray tell, would i not just take my own picture?  because i don't want to--yep. :)  and jocelyn's was just so well composed, i am fearful of my extremely yellow-hued lighting in my blue-countered apartment...so delay, delay, delay on using my own pics...ANYWAY...

vanilla syrup is the name of the game today.  sugar syrup--it's the mystery ingredient in iced coffee that you get from coffee houses...though theirs is not of the vanilla persuasion, the syrup itself transforms what could be a bland iced coffee into miraculous nectar....(or maybe i shouldn't be craving coffee when i write these things...)

this recipe actually comes directly from jocelyn's blog about life, love, fashion, faith and all sorts of great lifestyle stuff!  check it out at www.lemontree3.com

where, besides the blessed goodness of coffee, might this be used you ask?

well, think summer, think fruit, think sorbet!  though straight fruit is great in a sorbet, a touch of sugar evens things out--and using syrup rather than granules prevents that gritty oh-there-is-sugar-in-this experience.

think italian sodas.
replace the vanilla with mint extract and think amazing hot chocolate.
or amazing chocolate shake.
use coconut extract and you've got yourself coconut syrup...oh, the drool, oh the possibilities.

so without further adieu, by way of a lemon tree written by jocelyn, i give you jason's recipe for vanilla syrup.

vanilla syrup
by jason larsen

1 cup water
1 Tbsp vanilla extract
1 1/2 cups sugar

in a small saucepan, combine the ingredients together until sugar is fully dissolved and the liquid resembles a syrupy consistency.  store in sealed container.

Thursday, July 15, 2010

sesame noodles

sesame noodles.  i don't know why, but this recipe just reached out and grabbed me.  it was actually the first thing i made with my new-found tasty ingredient of sesame oil.  and oh, did it deliver.  this would be wonderful served with chicken, beef, or even a roasted pork chop.  it is good on it's own, but definitely designed as a "side", since it doesn't have a good source of protein.

below are my adaptations to the original recipe...

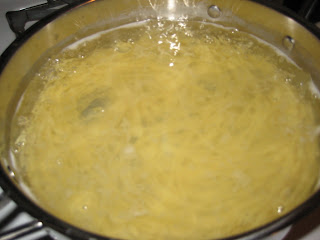
boil your favorite spaghetti noodles until al dente.  i didn't have my favorite whole wheat blend thin spaghetti so i "suffered" through with the standard fare.


as the noodles simmer away, combine all the amazing dressing ingredients together in a medium bowl--this will be where your noodles end up, so be sure the bowl is big enough to accommodate them all.


remove the noodles from the pasta water with tongs and put into the bowl with sauce.  toss around until the noodles are covered.

chop your handy-dandy green onions (both white and green parts), and add to the noodle mix.  toss one more time and serve.


 here's the recipe

sesame noodles
adapted from thepioneerwoman.com

12 ounces thin pasta noodles
4 whole green onions, diced

dressing:
1/4 cup low sodium soy sauce
2 Tbsp sugar
4 cloves garlic, minced
2 Tbsp rice vinegar
3 Tbsp pure sesame oil
1/2 tsp cayanne pepper (can use hot chili oil instead)
2 Tbsp hot water


bring a large pot of water to a boil.  add noodles and allow to cook until al dente.  in the meantime, whisk together sauce ingredients in a medium bowl.

when the noodles reach al dente, drain them and add to the bowl with the dressing.  toss together and sprinkle with green onions.  serve warm.


Thursday, July 8, 2010

shredded chicken enchiladas

chicken enchiladas in my repertoire came from the combination of a collection of random ingredients plus the desire for something hot from the oven.  so with my over-abundance of canned tomatoes (they grow so fast!), i set out to make homemade enchiladas.

i didn't take process pictures of this one, so i'll bypass the commentary and head straight to the recipe.  enjoy!

shredded chicken enchiladas
original recipe

2 chicken breasts
poultry seasoning to taste
1 small can chopped green chiles
1 small can chopped black olives
1 cup sour cream (any fat-level is fine)
2 cans (approx 26 oz) chopped canned tomatoes
1 small can tomato sauce (approx 5 oz)
2 Tbsp tomato paste
1 tsp cumin
2 cloves garlic, minced
salt & pepper to taste
1 cup shredded cheddar
8 burrito-sized flour tortillas


preheat oven to 350-degrees.

grill seasoned chicken until just cooked through (remember, it will go in the oven too).  remove from pan and set aside to cool.  as the chicken cools, put together the sauce.  in a medium saucepan combine tomatoes, tomato sauce, tomato paste, garlic, and cumin.  bring to just a simmer and allow to simmer for approximately 20 minutes until ingredient really infuse with each other.

while the sauce is simmering, shred the chicken to make the filling.  you can do this with your hands or with a couple of forks.  once the chicken is shredded, add the chiles and olives.  you may want to add some more grill seasoning to taste.  then add 1/2 cup enchilada sauce.  combine.

when sauce is done, spread approximately 1/4 cup of sauce in the bottom of a 9x13 baking dish.  for each enchilada, spread the tortilla with sour cream, put in filling and roll up the tortilla.  place in the baking dish and continue assembling the remaining bundles of enchilada goodness.

when pan is full, pour the remaining enchilada sauce over all of the prepared tortillas.  dollop with sour cream, then sprinkle with cheese.  bake 20-30 minutes, until sauce is bubbly and cheese is melted.  remove from oven and allow to rest 10 minutes before serving.  great with a side of rice and a chopped salad.

Friday, July 2, 2010

broccoli beef

broccoli beef
photo by ree drummond of pioneerwoman.com

if there is chinese food to be ordered, broccoli beef or sweet and sour chicken are my A#1 top orders.  and if i can get them in a dinner combo, i am a very happy girl!

i have shied away from trying to make broccoli beef myself because...well...at first i wanted it to be this magical thing i only ordered at a restaurant.  and then it was because i saw recipes with ingredients that i couldn't possibly believe would be used for more than one recipe--and where does one even find oyster sauce?!?  well, one finds it between the soy sauce and the sesame oil in the chinese food section of your run-of-the-mill grocery store.

this recipe is originally by jaden hair of steamykitchen.com .  i had tried her sweet and sour grilled chicken and liked it quite a lot (i have yet to tweak it to my personal tastes, so stay tuned for some later-date post on that).  that gave me confidence in her cooking and actually finding oyster sauce plus the anxiously-awaiting bag of frozen broccoli in my freezer basically begs for me to try this out.

for fantastic step-by-step photos, check out pioneerwoman.com (another great site for tasty, tasty cooking and great food photography).

my only change to this recipe was to double the stir fry sauce (because, well, i like sauce).  i also added a tablespoon of cornstarch to sauce instead of a teaspoon to the marinade.  the original sauce came out rather watery, so i wanted to goop that up a little.  oh, and i used stew meat--because it's what i already had on hand.

so if you want to increase your green veggies with a great, and really rather low-cal, recipe, try this out!  you won't regret it.
broccoli beef
adapted from pioneerwoman.com who got it from the steamy kitchen cookbook


1 pound thinly sliced steak (the recipe recommends top sirloin or flank--i used stew meat)
1 1/2 - 2 pounds broccoli, frozen okay
1 Tablespoon olive oil
1 Tablespoon minced garlic

marinade:
1 1/2 tsp low-sodium soy sauce
1/2 tsp oil (can be vegetable or olive or peanut or whatever---ooh! would be amazing with sesame)
black pepper to season

sauce:
3 Tbsp oyster sauce
2 tsp rice wine (or dry sherry)
2 tsp balsamic vinegar (or Chinese black vinegar)
1 Tbsp cornstarch

in a bowl or baking dish, combine the ingredients for the marinade.  add the beef, toss the meat until coated, then let marinate for 10 minutes at room temperature.

in a small bowl (ramekin works), whisk together the ingredients for the sauce.  set aside.

steam the broccoli by your method of choice.  this could be done in a microwave or on the stove.  drain.

in a dry saute pan large enough to hold everything, set the pan on high heat and when hot, add the olive oil.  swirl to coat the pan.  add the steak strips, keeping them in one layer--turn them after about 30 seconds (you don't want to overcook them).

pour the sauce into the meat.  stir to combine.  simmer until the sauce thickens enough to coat the back of a spoon.  add the broccoli and toss all the ingredients to coat.

serve alone or over rice.

Friday, June 25, 2010

lemon blueberry sour cream muffins

lemon blueberry sour cream muffins

photo by shanniebananie

once again i come to you without camera--so a huge thank you to the photo from the original recipe contributor.  if you're a fan of allrecipes.com, check out tastykitchen.com .  tastykitchen is still in the infancy, so there are a good number of recipes, but precious few reviews.  (for those of you new to these recipe compilation sites, allrecipes is great--just be very sure to read the reviews where even the most mediocre recipe is jazzed up and made better by other cooks/bakers so you can avoid the pitfalls.)

oh the tangents!  back to the muffins.  if you have never had a quick bread or muffin recipe using sour cream, oh you have missed out!

the original version of this recipe was a great start.  if you are interested in a moist blueberry muffin it is actually a great one--head on over to this link: original recipe.  (i cannot give opinion on the crumble topping as i didn't actually use it.)

i personally love an obvious lemon flavor, so i increased the lemon zest quite a bit from the original recipe.  i also only used vanilla extract instead of splitting the amount between vanilla and almond extract.  i forewent the crumble topping as i like my muffins with just a little sweetness--so i sprinkled each one with just a pinch or two of "sugar in the raw" before baking.

also, if you have never baked with sour cream in either quick breads or even cookies, there is a trick to it that is very easy, but makes a world of difference.  when you reach the stage of adding the sour cream and flour, you must, must alternate!  and you must start and finish with the flour.  i don't know the science behind it, but i tested the theory once by starting and ending with sour cream instead for some great cookies and the result was a sloppy-mess dough.  i often think in terms of splitting the flour into "thirds" and the sour cream into "half"--so my alternating would go flour, sour cream, flour, sour cream, flour.  do whatever math makes you happy, but just remember: alternate--flour first and last.

another note: if you're newish to quick breads or always find yours to be tough and/or dry, here's a tip: do not, do not, do not overbeat the batter.  mix just enough to just incorporate the ingredients.  the more beating, the tougher and drier your end result will be.

the end result of this recipe was quite delicious.  oh, if you would rather use frozen blueberries, got for it!  (if you thaw them first, you'll get purple muffins, which isn't necessarily a bad thing if you're feeding a slumber party.)

lemon blueberry sour cream muffins
adapted from shanniebananie on tastykitchen.com

2 cups flour
1 tsp salt
1/2 tsp baking soda
2 eggs
1 cup sugar
1/2 cup vegetable oil (i use canola)
1 tsp vanilla extract
2 Tbsp lemon zest
1 cup sour cream
1 to 1 1/2 cups blueberries, depending on your blueberry liking
scant 1/4 cup raw sugar

preheat oven to 400-degrees.  grease 12 regular-sized muffin cups (or you can use liners).

in a medium bowl, whisk together flour, salt, and baking soda.  set aside.

in a small bowl (or glass graduated measuring cup) combine vegetable oil, vanilla, and lemon zest.  set aside.

in your mixer, beat eggs on medium speed.  slowly add sugar.  slowly drizzle in oil mixture.

reduce mixer speed to low and add the flour and sour cream alternately, beginning and ending with flour.  beat just enough between additions to incorporate--do not overbeat.

spoon batter into prepared muffin tins.  you can fill each cup almost to the top.  sprinkle each with a couple pinches of raw sugar.  bake 18-20 minutes.

Saturday, June 19, 2010

Chicken Cashew Lettuce Wraps

photo by missamy

soooo, after moving, i have yet to unearth my camera.  it is here---somewhere---so i'm borrowing the picture from the original recipe :)

if you are a fan of a particular chain chinese food restaurant's lettuce wraps, these are for you!  so incredibly tasty and really rather easy to make.  the recipe below reflects my adaptations to the original posted by missamy on tastykitchen.com

my notes:
*if you like sauciness, use the recipe below as written (i doubled the original because i like extra sauce, especially when serving over rice).  if you like just enough sauce to flavor the chicken, you can easily 1/2 the recipe below to get that good glaze without extra dripping.

*my mouth wimps out when it comes to spicy foods.  i reduced the ground red pepper by half, but you could easily amp it up to meet your own spicy tolerance (mine is very low).

*you could easily use grated ginger in this recipe for a bit of additional freshness

*i enjoyed these using green leaf lettuce as a wrapper (not just a "plate" as seen in the picture).  i have had the restaurant version with iceberg lettuce, and though i liked the additional crunchiness of iceberg, it cracked every time and left the filling dropping everywhere.

*if using for a main dish, i would recommend a side of rice to add some bulk to the whole meal.  the prepared chicken with additional sauce would be great served on rice instead of in lettuce as well.

*if you plan on making enough for microwavable leftovers, leave the cashews out of the whole amount of prepared food and only sprinkle it on each serving---i learned the interesting way that cashews drenched in this sauce turn hard and black in the microwave :)  that's why i'm here, so you don't have to make those mistakes :)

*do not fear the ingredient of sesame oil.  i avoided recipes with it because i thought it would be expensive or i would have to go to a specialty shop.  but alas, i was wrong!  (yay for times like this where being wrong means i get great food!)  i found sesame oil in the ethnic food section at a very run-of-the-mill grocery store on the top shelf with the chinese food.  the bottle was about half the size of a typical soy sauce bottle, for about $2.50 but recipes tend to use it only a teaspoon or tablespoon at a time so this one bottle will last me quite a while.  check back later for more sesame-oil-using recipes...it's my new favorite ingredient!

with that, here is my adaptation to the original recipe.

Chicken Cashew Lettuce Wraps
adapted from missamy at TastyKitchen.com

2 Tbsp rice vinegar
2 Tbsp brown sugar
1/4 tsp ground red pepper
1/2 tsp grated fresh ginger (or 1/2 tsp ground ginger)
2 tsp sesame oil
1/4 cup low-sodium soy sauce
(optional: 1/2 tsp cornstarch if you want a saucy sauce.  if you are halving the recipe, leave out the cornstarch)
1.5 lbs chicken, cut in bite-sized pieces
2 cups diced onion (or 1/2 cup dried minced reconstituted in about that much water)
4 cloves garlic, minced
2 tsp soy sauce
1/2 cup cashews
green leaf lettuce
sesame seeds to garnish

mix the first six ingredients in a small bowl and set aside (a ramekin is big enough).  brown chicken until just cooked through.  remove from heat.  put onions, garlic and 2 tsp soy sauce in the pan; brown.  when onions and garlic are tender, add chicken and sauce mix (if all will be served at the same time, you can add the cashews here---if making enough for leftovers, leave out the cashews and sprinkle them over individual servings).  sprinkle with cornstarch (if using) and saute for a few minutes until blended well and heated through.  serve with lettuce leaves for wrapping (or over rice).  sprinkle with sesame seeds.

Monday, May 24, 2010

FAIL--cupboard cleaning recipe #4: double chocolate banana bread...


amendment: this recipe simply does not work.  i tried it again, following the directions, and i still ended up with extremely mushy bread (i even almost burnt it because i forgot about it in the oven).  sad, sad.  i think there's just too much liquid---maybe halfing the sour cream and halfing the butter would fix it--but, frankly, i'm not up for a third go-around.  my apologies!
~~~~
ah, the smell of rotting bananas.  if you don't bake with bananas, that thought probably turns your stomach. but to those of us who know the pure gold that comes with those growing black spots on an otherwise yellow fruit, it is the smell of goodness and hope.  well, at least of goodness.

i went on a search for a tasty banana bread recipe that was kinda dessert-y, but also used less oil than my current go-to banana bread.  i stumbled across this recipe and thought it was worth a shot.  it used sour cream and butter (rather than oil).

i deviated from the recipe in one way, and frankly, i regret it.  those of us who have made quick bread know that the #1 rule of quick breads is to mix just until incorporated for fear of making a stiff and dry bread.  i "knew better" than the recipe directions of mixing for 3 minutes in a kitchenaid (yes, the gasp of do-you-know-what-you're-doing hit me too when i read that)--but alas, the combination of bananas, sour cream, and butter are so moist that if you do as i did, and only stir until combined, your bread will be squatty and moist to the point of almost mushy.  so, i tip my hat to the exception of the rule and encourage you to follow the directions as originally written.

the bread has a great balance of banana and chocolate.  happy baking!

double chocolate banana bread
by alice at savory sweet life


makes two 9x5" loaves

2 sticks butter (1 cup)
1 cup sugar
2 eggs
4 large ripened bananas, mashed (or 5 small)
2 tsp vanilla
2 cups flour
2 tsp baking soda
4 Tbsp cocoa
1 cup sour cream
2 cups chocolate chips

preheat oven to 350-degrees.

cream butter and sugar together.  add egg, vanilla, sour cream, and bananas.  add baking soda, cocoa, and flour.  mix everything until well incorporated (about 3 minutes in a kitchenaid mixer).  stir in chocolate chips.

pour batter into two lightly greased 9x5" loaf pans.  bake 50-60 minutes.  allow to cool in pan approximately 10 minutes before turning out onto cooling rack to cool completely.

Monday, May 17, 2010

cupboard cleaning recipe #3: protein-rich avocado goodness...


this lovely picture of green deliciousness does not do justice to the goodness available to you.  in this second edition of what to do with random ingredients, we combine two seemingly disparate ingredients: greek yogurt and avocado.

greek yogurt has a tang kinda-sorta-but-not-really like sour cream.  the big difference is that greek yogurt has a great deal of protein in it.  in fact, a serving of greek yogurt has twice the protein of an egg!

that said, this dip/spread is versatile.  the recipe below is more dippy with balanced flavors.  if you want more of a creamy guacamole, use a full avocado and maybe even add some diced tomatoes.  i ate this with chips that had cheese melted on them--and let me tell you, the medium white cheddar was amazing with this dip.

oh, and in the spirit of cupboard-cleaning, there are a few dried ingredients in here that can easily be replaced with fresh.  happy dipping, spreading, guacamole-ing to you!

creamy avocado dip/spread
1/2 avocado, mashed (can up it to 1 full avacado for more of a guacamole)
1 six-ounce container plain greek yogurt (can use sour cream)
1 tsp lemon juice (could use lime here)
1/2 tsp dried cilantro (or 1 tsp fresh chopped)
1/8 tsp garlic salt
1/8 tsp dried onion
pepper to taste

mix well.  or in the infamous words of my mom: "mix as usual".

Monday, May 10, 2010

cleaning cupboards recipe #2: peanut butter cup type bars...


as the adventures in cupboard cleaning continues, stumbling upon three packages of graham crackers and a 1/2 cup of milk chocolate chips brings the obvious recipe of peanut butter cup-type bars...mmm, just like those terrible (wonderful) candy cups, this made-at-home recipe rivals it closely.

take one package of graham crackers and beat the tar out of them with a rolling pin--you may want to put them in a plastic bag first, but that mess is entirely up to you.  dump them in a medium mixing bowl and add powdered sugar.  set aside.

in a small saucepan, melt butter with peanut butter.  once melted, remove from heat and stir in vanilla.  add to graham cracker mixture and stir to combine.

lightly spray an 8x8 pan and lightly press graham cracker mixture into pan.  in another saucepan (or microwave-safe bowl), melt milk chocolate chips and semi-sweet chips together.  then spread that glorious mixture over top the graham cracker layer.

now, a more classy blogger would refrigerate this for 30-45 minutes until the chocolate sets, would then cut a perfectly measured portion and show you the layers in beautiful symmetry.  but....well...that is not the way of my people.  my people are more of a scoop-a-heap-while-it's-still-warm kind of people.  which is why you get this instead:

yes, these can be made in mini-muffin cups.  you could also paint melted chocolate on the bottom and sides of said mini-muffin cups, freeze for the chocolate to set, then fill with graham cracker mixture, then top with rest of chocolate.  yeah.  we didn't do that today.  somedays the craving for pb&choc is too strong for such dilly-dallying.

make your choice.  enjoy the results!

peanut butter cup-type bars


1 cup peanut butter
1/2 cup butter
1/2 tsp vanilla
1 1/2 cup graham cracker crumbs
1/2 cup powdered sugar
1/2 cup milk chocolate chips
1/2 cup semi-sweet chocolate chips

crush graham crackers to make 1 1/2 cups of crumbs (approximately 12 long crackers).  put in medium mixing bowl.  add powdered sugar and set aside.

in a small saucepan, melt peanut butter and butter together, stirring continually to keep butter from browning.  remove from heat and add vanilla.  pour over graham cracker mixture.

lightly spray an 8x8 baking dish.  lightly press graham cracker mixture into dish.  melt all chocolate chips together.  spread over graham cracker mixture.

refrigerate until chocolate is set.  can be kept, covered, at room temperature.

Thursday, May 6, 2010

cupboard cleaning recipe #1: iced coffee...


the adventure in cupboard cleaning launches with this post.  aren't you excited to see how to use the random assortment of odds and ends that seem to accumulate in the back of cupboards, freezers, and fridges?

why would i be motived to do such a thing?  well, it's simple: i am moving in a month and though the move is just across town, i still do not want to pack the odd accumulation of strange ingredients that have invaded my cupboards.  a fresh start is desired.  and let's face it, a new place just isn't home until after the first grocery-run!

so here we go, on a varied adventure of miscellaneous recipes.  first off: iced coffee.  how is iced coffee weird?  well, you know that pound of coffee you bought, made one pot, and thought "hmmm, it's okay, but i certainly don't want to drink that every morning."  it wasn't terrible, but it did bring a furrowed brow and a second thought.  but rather than toss it in the trash, you toss it in the freezer and forget about it.  THAT is a great coffee for this recipe.

iced coffee is your answer!  the beauty of iced coffee is two-fold:
1) it uses a lot of grounds in one fell swoop
2) the cold water brewing tames down some less desirable flavors if you don't like that coffee, and
3) you can store it in the fridge for many days...

yeah--the beauty turned out to be three-fold!  plus, it is WAY less expensive than buying the same at your local coffee shop.

take about a cup of grounds and toss 'em in a glass pitcher.  i use glass rather than plastic simply because the coffee smell tends to infiltrate plastic--and can you imagine making lemonade in that coffee-smelling pitcher later in the summer?  ick.  however, if you're committed to iced coffee enough for an identified coffee-only pitcher, plastic would work fine.

then cover the grounds with cool to cold water (NOT hot or warm.  warm-brewed creates that old-coffee taste later.  cold brewed does not.  it's a beautiful thing.)  the grounds will float around--i use a large spoon to push the grounds around, but this is not necessary.  the water will saturate them throughout the process.

then, cover the pitcher with plastic wrap and let it sit on the counter for 24 hours.

after 24 hours, unwrap the plastic wrap (you can save it) and grab your favorite slotted spoon to scoop out the majority of the grounds:

you won't be able to get them all, which is where your good ol' coffee maker comes into play.  DO NOT DUMP THIS IN THE WATER RESERVOIR.  sorry--needed to get that out.  instead, put a coffee filter in your coffee maker as you normally would, then slowly pour this directly into the filter:

i repeat: NOT the water reservoir (as if you were making a normal pot of coffee), but straight through the filter.  you may have to take a break or three depending on how quickly the water drains through the filter and into the coffee pot.  once the pitcher is empty, you'll need to clean out your pitcher:

one note: be wiser than i and refrain from slathering your hands with lotion during one of the filtering breaks.  washing a soapy glass pitcher with freshly lotioned hands was quite the slippery adventure!  lotion can come later.

once all the happy filtering is complete, dispose of the grounds-filled filter as you normally would and pour the coffee back into your pitcher.

now you can pour yourself a lovely cup of iced coffee and dress it up however you desire...i like mine with cream and sugar....oooh, creamy swirls:

just a reminder for you sugar-users--regular sugar takes a little bit to dissolve in iced coffee.  it will dissolve, just stir a few extra times.  quicker mix-ins would be agave, sugar syrup, or coffee flavorings.  regardless, it's tasty stuff.  and it will keep, plastic covered, for a week or more in the fridge, so don't be afraid to make a full pitcher.

iced coffee
1 cup coffee grounds
enough cool water to fill a pitcher (5-6 cups)

put coffee grounds in the pitcher and fill with cool or cold water.  cover with plastic wrap and let sit on counter for 24 hours.  using a slotted spoon, scoop out as much of the grounds as you can.  then run the rest through a filter in a coffee maker (NOT through the water reservoir).  pour filtered coffee into cleaned pitcher, cover with plastic and store in the fridge.

Wednesday, March 24, 2010

shepherd's pie...(why is it called that?)


i could look into why this is called shepherd's pie. or not. let's go with not.

the craving hit for something comfort-foodish. combine that with the ongoing deficiency of vegetables in my world AND the fact that many of my pots were in the dishwasher. and now you have this post. few dishes were dirtied in the creation of this meal.

it's tasty, it's comforty, it only uses dirties three different containers (if you don't wash in between), and frankly, it's easy. on top of it, what better way to both practice your knife skills AND get all five servings of vegetables in one dish?!?


and yes, you can top it with tater tots instead of potatoes. ahhhh, tater tots. but alas, why screw up all that great vegetable-eating by slathering them in deep-fried anything? (let's not kid around, on another day, we're going with the tater tots...that day is not today.)

you can switch this up with different meats, different vegetables, and different toppings. it's great for getting rid of leftovers and frozen stuff! enough of that--here's the recipe:

shepherd's pie

2 baking potatoes, peeled and chopped
2 Tbsp butter
3 Tbsp half-n-half
1-pound ground beef
2 Tbsp minced garlic
1 Tbsp dried minced onion
1-2 Tbsp steak seasoning (to taste) (i use this steak seasoning for all things beefy)
2 carrots, peeled, chopped
3 celery, chopped
1 cup green beans
1 cup corn (i used frozen sweet corn)
1 large tomato, chopped
3/4 cup beef broth
1 cup sour cream (i used tillamook fat free)
2 tsp flour
Salt and pepper to taste

Preheat oven to 400-degrees.

Put the chopped potatoes in a saucepan, cover with cold water, and set to simmer until potatoes are tender, approximately 20 minutes.

Brown the ground beef in a separate skillet, adding the onion and garlic approximately half-way through the cooking. If you used a higher fat beef, spoon out some of the fat (lower fat beef won't have more than a tablespoon or two of fat).

Once the beef is browned, add the carrots and allow to saute 5 minutes. Add celery and allow to saute another 3-5 minutes. If using frozen beans and corn, add them now and cover the pan, allowing them to thaw and steam a little, approximately 3 minutes. Add tomatoes.


Add broth and sour cream, stirring until the sour cream breaks up and incorporates to make a white sauce. Sprinkle flour over if the sauce needs some thickening. Allow to simmer 2-3 minutes. Turn off the heat.

Among all that simmering, you can prepare the mashed potatoes. Once the potatoes are tender, drain out the water and put potatoes back in the hot saucepan. Add butter and allow to melt. Once melted, add half-n-half (milk would work too) while mashing with a fork until the potatoes are your desired consistency. For this recipe, I mashed to just a "rustic" level of mashing and less creamy than if I were serving them alongside something else.

Pour the beef mixture into a baking dish. I used a 9x11, but that almost went over the edge of the pan. A deep dish pie plate or 9x13 would suffice. (You could even split it among two smaller, 8-inch rounds and freeze one for later.)


Top the beef mixture with the potatoes. Bake for 20 minutes, to heat through. Allow to set 5-10 minutes to allow the sauce to filter back down and settle a bit.


mmmmm.....oh, by the way, a big thanks to the pioneer woman for tips on improving food pictures, even with my point-and-shoot digital camera. (sorry for the dark final product, i was losing daylight!) and this was on a relatively cloudy day--so for all you west-coasters, it is possible to use "natural light" when one hasn't seen the sun for a while.

Saturday, February 27, 2010

why do i cook?

i saw this title on another food blog and my heart lept. i didn't read the entry, because my own ideas were percolating...but something about that title caused me to stop and reflect...

why do i cook?
because the act of creation is freeing,
relaxing,
empowering.

because taking things
that by themselves
are one thing,
and bringing them together
to make something else
amazes me every time.

the eggs i scramble one morning,
can be a crepe the next morning,
or cookies by the afternoon.

the buttermilk in my fridge
can marinate onion slices for onion rings,
or add richness to cakes.

why do i cook?
because i learn something every time.
not just about food,
but about life.

the focus it takes to spoon
a single teaspoon of batter
into a mini-cupcake liner
shows me how even the little things
deserve our attention.

the planning required
to transport 120 of said mini cupcakes
120 miles
already frosted and decorated
without them tipping
and still being able to handle them
speaks volumes
of all the intricate planning
God does
on behalf of us
every moment of the day.

my almost complete inadequacy in frosting anything
used to be complete inadequacy.
and i learn that some things
just need practice.

so though this blog will give recipes,
tips,
and tricks,
the reason i cook
is because it is one more way God shows me who He is,
and one more way i can love others.

by the way, the mini cupcakes i did this weekend are:
triple chocolate cake (using mini chocolate chips due to the mini nature of the cupcake)

each kind was frosted with this
cream cheese frosting (though i added a few tablespoons of milk for spreadability)

the frosted triple chocolate version were decorated with three upright, regular-sized semi-sweet chocolate chips.

the frosted lemon cupcakes were decorated with three lemonhead candies.

each batter only needed 11-12 minutes in the oven at the recommended temperature.